Pages

Showing posts with label crafty. Show all posts

Monday, February 7, 2011

repurposing a large frame: diy

I hope you had a good weekend! We took a little family outing to IKEA on Friday night. It's a fun outing for everyone. We eat a cheap, yummy meal of sweedish meatballs and chocolate cake (I'm sure it's very healthy for us!), and then David and I get a little date night while the girls play in Small Land. They're brilliant to provide dinner and childcare and fun shopping all in one location. I love IKEA.

I will share my one little tip that we learned the hard way on Friday night. You must have your kids checked into childcare ONE HOUR before the store closes. I was not aware of that little factoid. So we arrived at Small Land at 7:08, and found out the store closed at 8:00pm, and that childcare was closed. It was a very sad moment for everyone. The girls love playing there, and we were looking forward to a little browsing time with just little Z.

Anyway, we ran into an old friend while shopping with the family. And, she totally made my night telling me that she checked this blog everyday! Really? Everyday? That's encouraging. I love hearing that someone reads this blog and enjoys it! Thanks, Jackie!

On to the subject of this post. Remember when I was stuck in a rut? I'm slowly working my way out of it. I decided to keep that large frame and repurpose it. I liked the size of it, and I didn't want to start from scratch, so I decided to try to work with it. I've been wanting to get more of my photography into my living room, and love how this turned out!

Photobucket

I had to tear off the backside of the frame and remove a bunch of staples and large piece of cardboard. When I took the actual print out, I realized it was glued to the matte board, so I just stuck my photos on top of the print by using the oh-so-high-tech scotch tape. Yes, scotch tape. In order to figure out what sized photos would work best, I took lots of measurements, and realized that I could fit 6 rows and 6 columns of 4x6 sized photos almost perfectly. The last column on the right is very slightly overlapped underneath the column beside it.

Photobucket

I just used photos that I already had on hand. (I have a box full still waiting for me to do something with them!) But, now that I know I love this, I'll probably be more diligent about printing out photos I love in order to put them in this frame.

Photobucket

Still don't love my sconces next to the large frame, but I'm so proud of taking a baby step! I'm thinking something more modern. Maybe some W's? I'm going for the non matchy-matchy look. Any more ideas?

Wednesday, February 2, 2011

baby legs

Photobucket

Every cute baby must have a pair of baby legs. I'd been looking on etsy for awhile and had not found any that I loved for a price that I loved (i.e. I'm a little bit cheap sometimes!) But, then, I read this blog post with a link to this DIY tutorial on how to make some.

Photobucket

Wow, they were so easy! I found knee-high socks at Target for just $2 a pair. That is a good price for baby legs, in my opinion.

My little baby model was not so into modeling.  As soon as I lay him down for this shot, he rolled over. Again and again.

Photobucket
Oh well, he's off!

I experimented with an over-edge stitch on the first pair, which I do not recommend. Using a straight stitch was much more straight forward. (Pardon the pun!)

Photobucket

I think he likes them no matter what his daddy says!

Tuesday, January 25, 2011

winter centerpiece {DIY}

It's always bare and boring in January after the Christmas decorations come down. I've struggled to know what to put up after Christmas. I don't want to see red or green or gold anymore, but I'm not quite ready for Valentine's decor in January. I think I finally stumbled upon something that I like.

The idea began with a simple branch. I broke it off of some nearby shrubs--no, not my neighbor's. These were crazy-wild shrubs that grow along a nearby walking path. Trust me. No one will notice their absence. I was looking for a branch that had several off-shoots, and would look sort of tree-like.

Photobucket

I stuck mine in a carafe and used river rocks to support the base so that it would stand upright. At this point, David was seriously doubting my artistic abilities. What in the world are you doing bringing some dead branch into our house?! He didn't actually say those words, but we've been married 10 years, and I can tell you, that's exactly what he was thinking.

Photobucket

Oh, husband of little faith. Just wait. Next, I dug out some pretty little silk flowers. I really like the flowers, but didn't just love how they were arranged on the original stem. So, I pulled them off. There was a perfect little hole in the center of each flower.

Photobucket

They perfectly fit onto the ends of my dead branch. And now, it's not just a dead branch. It's a winter centerpiece! Totally easy, and totally free. I love that.

Photobucket

Tuesday, November 30, 2010

thankful

It's become our tradition every Thanksgiving to make "thankful links."

We've been doing this since Miss A was 15 months old and Miss M was 3.  Back then, we asked the girls to tell us something they were thankful for and we wrote it down for them.  Now, we each write our own!

I use old scrapbooking paper to cut long 1-1/2 inch strips.  This year I used Christmas colors: red, dark red, green and white.  We had the parade on in the background as we were doing this.  It was really low key.  Everyone can write as many or as few as they'd like, and take as long as they want to finish.  When everyone is done, we staple the strips together to make a long chain-link.  The girls love it, and it's become a fun tradition.

What are your favorite traditions?


Photobucket


Thursday, September 2, 2010

getting organized

September is here. School has begun. It's time to get organized.

Some of you know I'm a Jazzercise instructor. I know it sounds so 80's-ish, but believe me, if you haven't been to Jazzercise lately, you haven't been to Jazzercise. It's an awesome workout that will kick. your. butt. Seriously. You should check it out.

Anyway, I digress. We have an amazing instructor team this Fall. There are four of us. Four. Wow. I am so excited! With four of us, trying to figure out our teaching schedule was a bit of a mental challenge.

So, I thought a little visual aid might help. I started with some circles, one color per person, and added our initial to make it more fun.

Photobucket

I then arranged them on a little calendar that I made. Here's the artsy shot.
Photobucket

And, voila! It was so much easier to see our options and trade out days to find what would work best. I'm going to make sure the circles are not affixed permanently so that we can make changes as needed.

Photobucket

You can use this idea too. How about a chore chart? Or a school schedule? Just change out the AM/PM for subjects or chores. Be creative!

Oh, and just in case you workout with us, this schedule is not yet finalized. We'll let you know when it is!

Monday, June 14, 2010

sisterly love.

Before little Z was born, I was a bit bored, just sitting around waiting for him to come. I decided it was time to hit the scrapping again.

This one goes back to 2008. I'm not exactly a chronological scrabooker. I'm almost finished with my 2006 album, and am concurrently working on 2007, 2008, 2009, and now 2010. At least I'm fairly organized about the process, just not chronological. I guess I stay motivated that way, working with photos that I love first, and finishing up the odds and ends later.

Photobucket

Saturday, April 17, 2010

the nursery

It's still empty, but here it is, just waiting for a baby boy to come along. Any day now, any day! The picture frames will be much happier once they are filled with the newest little Wood's face.

Photobucket

Photobucket

Friday, March 13, 2009

home decor

Here's my latest home decorating project. I painted the girls' bathroom green with a fun scalloped edge. The finishing touch: three pink circles topped with fabric-matted frames. I love it!

Photobucket


Photobucket

Thursday, August 28, 2008

a new way to budget

girls
Ever heard of the envelope system? I was a big fan of it before I was married and living overseas. Since then, we've tried a few different sytems for budgeting and tracking our expenses, including Principal Plan and Mvelopes. Both were electronic envelope systems. They worked well enough, but both required a lot of maintenance. I want to simplify, so I made a little cash carrier for my new plan.

Here's how it's going to work. All of our discretionary spending will be funded once a month into envelopes. We've agreed upon categories: the girls, our personal allowances, home/gifts and eating out. Once the money is gone, we won't spend out of that category until the next month. Alternatively, we could borrow out of another envelope if we wanted to. There's no need to track this spending because it tracks itself. We can physically see if we have the money or not.

eatingout

I took five envelopes and glued them together with scrapbook paper to make a binding.
sideview

Then, I glued all the flaps inside except for the outer envleope which I glued extra paper to in order to make a larger flap. After adding a button with some ribbon for the closure, I mod-podged the front and backsides to make them a bit more sturdy. Thus, the glossy look.

budget
So, how do you budget? What's your best tip or system?

Saturday, August 23, 2008

to encourage a little more sanity at home...

Photobucket
...I made a privilege board, inspired by my friend Emily. Those last few days of summer vacation were getting very whiney, and we were all losing it more than I'd like to admit. The kids weren't the only ones screaming and running around the house! I loved the concept Emily shared on her crafty blog! She used old scrapping materials, but I just used crafty left-overs. Basically I decided upon some privileges my kids often have. Can you tell what they are from my cryptic drawings?

the goods
Computer time, afternoon TV, a sweet thing, and Saturday morning cartoons to name a few. I bought a $5 magnetic board and covered it with some scrapbooking paper, ribbons, and stickers. The "privilege magnets" are clear glass pebbles. I drew pictures and glued then onto the back of the pebbles, then glued the magnets onto the paper.

privilege
So, each day most of the privileges stay in the "X" column except for the ones that they get for the day. I decide what the privileges are. Usually it's one or two for the day. It's helped with the whining a lot. If they know that we're not watching TV on a certain day, they don't ask so much. The left side of the board sort of tracks their behavior. They know if they get to the bottom, then I'll take away a privilege for the day. Any kind of fighting/screaming results in BOTH of their magnets moving down. They get real motivated to play nicely if they're both on the "2." It's amazing how nice they can be to each other.

Wednesday, August 20, 2008

recycling unwanted crayons

Tropical storm Fay managed to gloom-ify our day yesterday by being the cause of a ton of rain and our school cancellation. So, we decided to get creative. I'd had a Ziplock of crayons laying around and decided it was time to do something fun with them. Here's the recipe.

Take your unwanted crayons. My girls enjoyed sorting them by color and peeling most of the wrappers off.
crayola

After the wrappers are peeled off, break 'em up into little pieces. Bake in a muffin tin at 170F for 15-30 minutes or until they're totally melted.
little pieces

After they've cooled, stick the pan in the freezer for a few mintues.
They'll pop right out of the muffin tins, and presto: crayon chunks.
crayon cakes

Thursday, July 3, 2008

love those eyes

There's a first for everything, right? Here's my first post of a scrapbook layout that I did recently. I took the photo a year and a half ago, and just got around to scrapping it last month. I've loved scrapping in the past, but in the last year and a half, have invested all my creative juices into photography. But, I LOVE to be creative and crafty, and I'm so happy to be doing it again. Thanks, Emily, for inspiring me to get started again.


Friday, February 15, 2008

being crafty

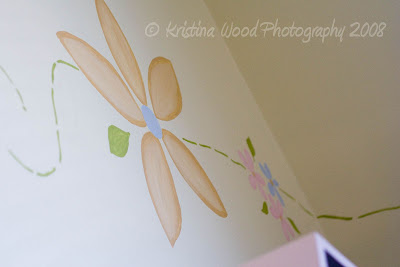
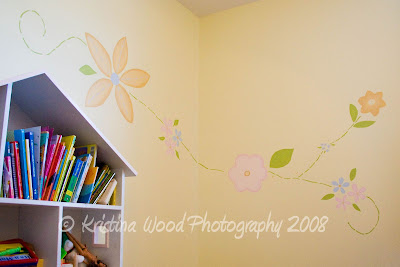
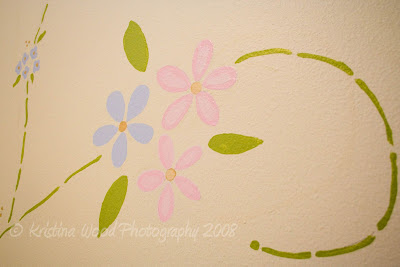
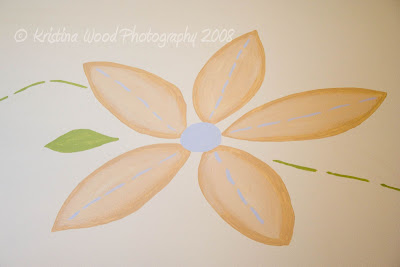
I LOVE to be crafty. It's so fun and refreshing for me. Unfortunately, I haven't made much time for craftiness lately. Maybe it's due to my "craft" desk being a dumping grounds for everything else. However, I was inspired to complete a project in A's room that's only been an idea for the last year. Here's what I was up to yesterday.


(Don't mind the mess on the bookshelves. I think this is A's version of cleaning her room.) Thanks, again Dad for building this awesome shelf. We sure love it and use it a TON!


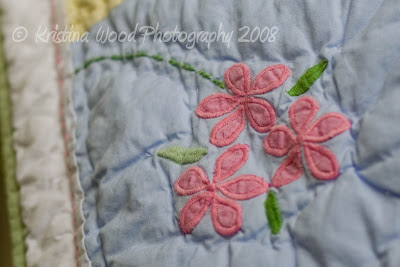
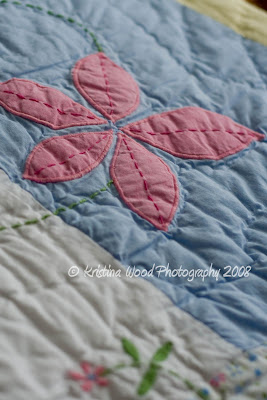
Here's the quilt that inspired me. (Thanks, Grandad! A loves her quilt!)